Let the chaos be gone.
A place where I can keep my electronics and do my experimenting - and still have a tidy living space.
Ever since I was a young lad, around 12 years old or so, I wanted to own a bureau or chatol, as it is called where I come from. I think my fascination came from a bureau , I saw in an old antique shop, in the town I grew up in.
That, of course, was a proper bureau. It was made from beautiful dark wood. It had loads of drawers and doors and of course some secret doors and drawers too.
At that age I started working with electronics as a hobby. Being four brothers in the same house, meant that there were quite a bit of sharing spaces. So a bureau would be perfect for all my experimenting. I never got around to get one, but coming from quite a creative family, I decided finally to try to build my own simplified version. Now I only hope my old childhood dream finally comes to good use.
Well I haven't aimed to build a it like the one I saw in the shop. First of all, it would be way too big and way out of my comfort zone. The content of my toolbox is limited to a nail file and a pencil sharpener (more or less). So I have to, and want to, keep it simple. At least for this - my first piece of furniture.
It is just supposed to be a place where I can work with electronics and be able to literally close the lid when taking a break, without having to clean everything up.
Living in an Amsterdam flat, in the middle of the old city, space is very limited. So every corner has to be used to its optimal, without making it in to a total clutter of course.
As you can see on the images below, one drawer section can rotate outwards to give more leg space when sitting working. The total width of the chatol is 110cm. I obviously wanted plenty of drawers on both sides. The drawer section on the right side is 30cm wide and full depth, 40cm. This fits an A4 with room to spare. The swing drawer, as I have decided to call it, is 40cm wide and 30cm deep. This gives 50cm of leg space. That is enough while sitting, but when getting up you will bump into one of the drawer sections. So by swinging one drawer away while working, gives just that extra space needed. I could have made a drawer on wheels, but that would make the construction unstable.
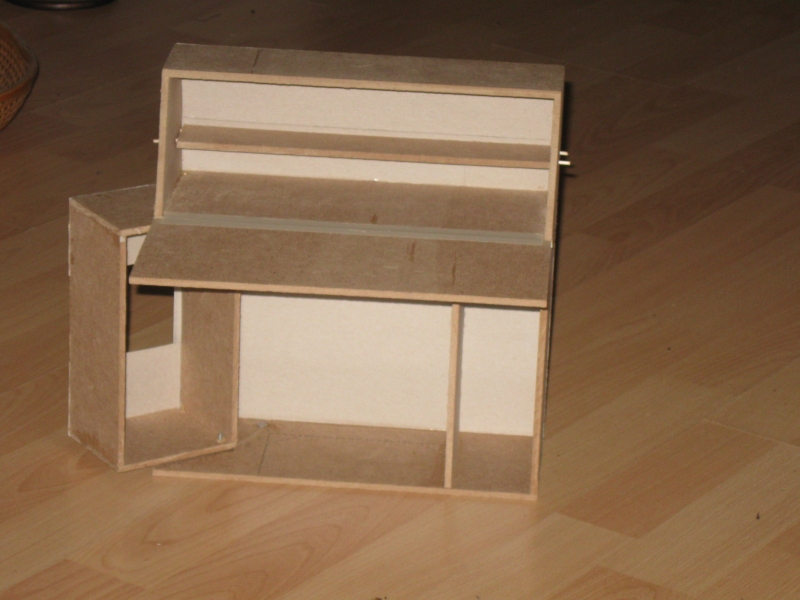
Here under is a model I made from 4mm MDF. I wanted to check if my design was stable enough. The full scale version is made mainly from 18mm MDF.
This small model is actually amazingly strong. I’m not sure if this is a scientific correct approach. But I have trusted my instincts and started the build.

This is a scaled model to check the stability. It is made from 4mm MDF and cardboard. And a couple of tooth picks :-)

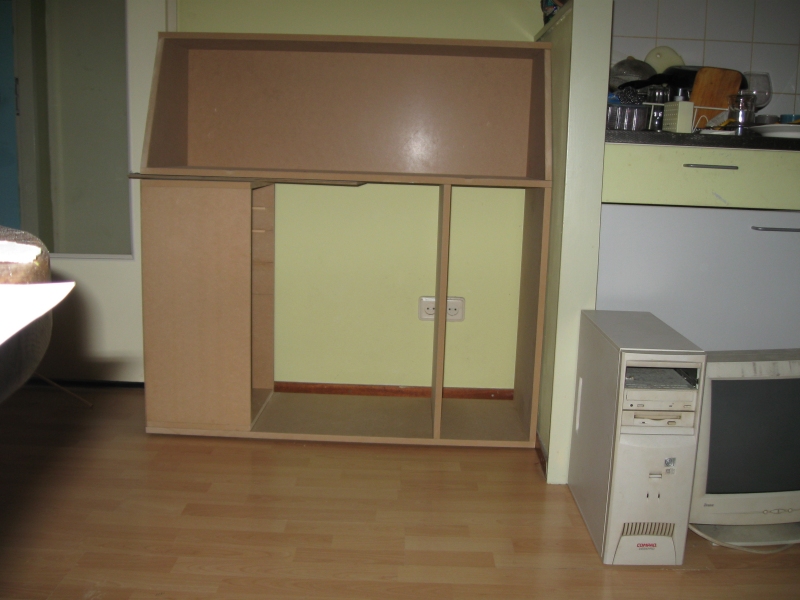
Well it's not too way off.

Only the kitchen could do with a kind hand.

Oh - what to do with the wall socket?

Yes it swings!

Just need to cut out the bottom plate.

First test run. I just couldn't help it.
By the way, look at that kitchen table. It's all shiny.

Oh the everlasting paper stacks. Soon I will get rid of them. Or at least stuff them in one of my new drawers.

Well, just another angle. But I haven’t got the faintest idea what colour to give it.
That, of course, was a proper bureau. It was made from beautiful dark wood. It had loads of drawers and doors and of course some secret doors and drawers too.
At that age I started working with electronics as a hobby. Being four brothers in the same house, meant that there were quite a bit of sharing spaces. So a bureau would be perfect for all my experimenting. I never got around to get one, but coming from quite a creative family, I decided finally to try to build my own simplified version. Now I only hope my old childhood dream finally comes to good use.
Well I haven't aimed to build a it like the one I saw in the shop. First of all, it would be way too big and way out of my comfort zone. The content of my toolbox is limited to a nail file and a pencil sharpener (more or less). So I have to, and want to, keep it simple. At least for this - my first piece of furniture.
It is just supposed to be a place where I can work with electronics and be able to literally close the lid when taking a break, without having to clean everything up.
Living in an Amsterdam flat, in the middle of the old city, space is very limited. So every corner has to be used to its optimal, without making it in to a total clutter of course.
As you can see on the images below, one drawer section can rotate outwards to give more leg space when sitting working. The total width of the chatol is 110cm. I obviously wanted plenty of drawers on both sides. The drawer section on the right side is 30cm wide and full depth, 40cm. This fits an A4 with room to spare. The swing drawer, as I have decided to call it, is 40cm wide and 30cm deep. This gives 50cm of leg space. That is enough while sitting, but when getting up you will bump into one of the drawer sections. So by swinging one drawer away while working, gives just that extra space needed. I could have made a drawer on wheels, but that would make the construction unstable.
Here under is a model I made from 4mm MDF. I wanted to check if my design was stable enough. The full scale version is made mainly from 18mm MDF.
This small model is actually amazingly strong. I’m not sure if this is a scientific correct approach. But I have trusted my instincts and started the build.

This is a scaled model to check the stability. It is made from 4mm MDF and cardboard. And a couple of tooth picks :-)

Well it's not too way off.

Only the kitchen could do with a kind hand.

Oh - what to do with the wall socket?

Yes it swings!

Just need to cut out the bottom plate.

First test run. I just couldn't help it.
By the way, look at that kitchen table. It's all shiny.

Oh the everlasting paper stacks. Soon I will get rid of them. Or at least stuff them in one of my new drawers.

Well, just another angle. But I haven’t got the faintest idea what colour to give it.

No comments:
Post a Comment